


Sharpen your knives at home with this easy DIY project.
Plenty of grand plans to show you what to do
How to Sharpen a Knife
Sharpening is the first step in maintaining your kitchen knives, but it’s also one of the most important steps you can take for safety reasons. If you don’t know what you’re doing when sharpening, you could end up cutting yourself or, even worse, someone else! Here are some tips on how to properly sharpen a knife:
Use an appropriate tool – A good quality steel will do just ne if you have access to one.
How To Sharpen A Kitchen Knife With The Best Way
The best way to sharpen your kitchen knives is to use an electric or manual grinder and then hone them on a whetstone. This method works well for most types of blades, including serrated ones. However, if you have a lot of time on your hands, it’s also possible to sharpen a blade manually without any special equipment.
A stick sharpener
The First tool you need is an old wooden dowel or pencil rod. Cut it half lengthwise, so you have one long piece about 3/4 inches wide by 6 inches long. Then cut off all but 2 inches at each end. This will give your knife blade more surface area on which to rest when being sharpened.
A V-sharpener
The V-shaped blade is designed to t into any standard or custom-made holder and can be used on straight-edged and serrated edges. This tool works best when using oiled steel such as carbon steels, stainless steels, high-speed steels, etc., but it will work well on most other types of steels if they are correctly prepared.
A steel
The first tool you should have is a good-quality stainless steel blade called a whetstone. This is what most people think of when they hear the word “steel.” They may even call this their favorite part of the process. If so, you’ve got another thing coming. Steel blades cost around $20-$30 each. So unless you plan to buy dozens every month, save yourself the expense by using a stone instead.
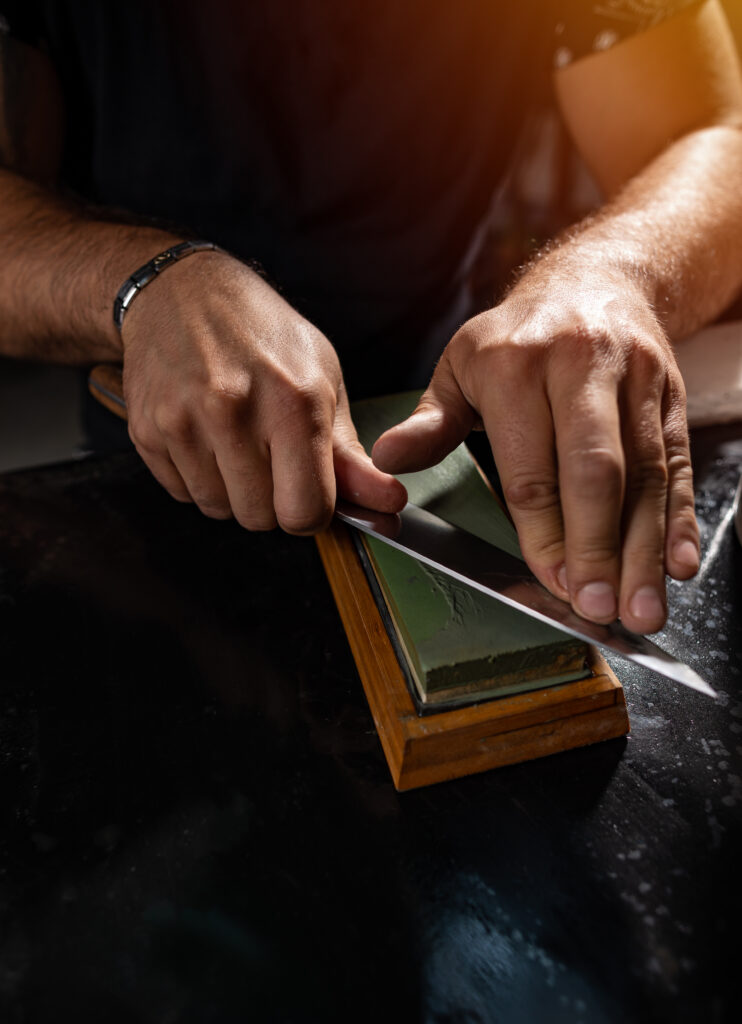
Whetstones come in all shapes and sizes.
Roughout the edge
The first step in sharpening a knife is roughen its edge by dragging it along the smooth surface. This removes burrs and creates microscopic scratches called nicks. This helps create friction between the blade and the steel, so they won’t slip off during use.
You want to do this slowly enough to avoid damaging the blade itself. Start just above where the handle meets the knife and work toward the tip. When you reach the point, stop and move back slightly.
Check with the thumbnail test (be careful)
The goal here isn’t to create a razor-like edge. Instead, you want to roughen the blade so it won’t catch on things during normal usage. This step should take no longer than 30 seconds per side.
If you’ve never done this before, start by using a small amount of oil. Then work your way up to regular cooking oils such as olive oil or vegetable shortening. Once you master this technique, try different types of fats.
Hone the edge
If you want to take this step further, try using a piece of sandpaper wrapped around a dowel instead of steel. Sandpapering removes even more metal and makes the blade sharper. Just remember to cover the paper tightly so it won’t slip off during use.
Fine-tune the edge
Now move the knife back and forth along the steel. This time, apply moderate pressure. As you do, notice where the blade stops moving quickly.
Breathe Life Into Old Blades With This High-Tech Knife Sharpener
The best way to sharpen your knives is with the right tool for the job. Good quality steel will do wonders in keeping them razor-sharp and ready to always use. But if you don’t have access to one of these tools or want something more convenient than having to go out on the hunt every time you need to hone up your blades, then this high-tech knife sharpening machine might be what you are looking for.
Sharpen the knife
You may have noticed there are two holes at each side of the handle. One holds the knife while the other allows air ow around the knife’s cutting surface. Make sure both holes remain clear. If necessary, use a small piece of wood to push against the inside wall of the cavity to make space for the knife.
Once done, insert the knife through the front opening of the sharpener. Ensure the tip of the blade remains at against the bottom plate.
Improvised Sharpening Stones
It should slide easily. If it sticks, you’re done.
I’m sure you know how to test a knife-edge now. But here’s another trick. Put a drop of water on the backside of the blade. Then run your finger along the edge. See where it stops? That’s the point where the steel meets the handle.
A lot of people don’t realize that. They assume the whole length of the blade is equally sharp. Not so!
Knife Sharpening Tricks
The best way I’ve found for sharpening is with an angle grinder or Dremel tool. It’s not as easy as it looks, though. The first thing that needs to be done is grind off all the dull old steel from the blade. You can do this using either a grinding wheel on your grinder or just sanding down the entire blade length until there isn’t any more metal left in the handle.
Use a Sharpening Stone for Razor Sharpness
A stone will help keep your scissors razor-sharp by removing any burrs and nicks left behind after using one of the above methods. A good quality stone should last years without losing its effectiveness. It’s important to note that stones aren’t cheap. They range anywhere between $20-$100+. But it’s worth every cent because they’ll make your scissors feel so much better when used.
The first thing you need to do is to get yourself a stone.
Conclusion:
These are some methods to sharpen knives easily at home!